
Another thing that always bugged me was the color of our island. We bought semi-custom pre-finished cabinets from CliqStudios (which I LOVE and highly recommend!) but at the time, they only had a few colors to choose from. We picked "Urban Stone", which is a medium grey with mauve/taupe undertones. It's a great color, but never really felt like the right fit in this space (somehow it always looked purple to me!). I've been wanting to paint it for a long time, but always felt intimidated by the idea.
These gorgeous inspiration pictures certainly made the intimidation factor seem more tolerable:
 |
| Design: Amber Interiors Photography: Tessa Neustadt |
 |
| Design: Cher House |
Windows:
First of all, one of the questions I've been asked a lot is what material my windows are made of. They are Jeld-Wen Siteline casement windows with wood grilles. This made them very easy to paint, as opposed to another material like metal or vinyl.
 |
| BEFORE: White Interior Windows |

I used my absolute favorite paintbrush ever, the Wooster Shortcut (this is pretty much the ONLY paintbrush I ever use!). It's perfect for cutting in close on a project like this and getting really crisp. clean lines.
What I'm about to tell you next is (in my opinion) the single most important component of any painting project. It's a latex paint additive called Floetrol, and it is basically liquid magic. I literally NEVER paint without this stuff. It makes it so you can work with the paint for longer before it starts to dry and all but eliminates any visible brush strokes or roller marks for a super-smooth finish. When we had professional painters here during our renovation, they saw that I had this stuff and said "hey WAIT, how do YOU know about this!?", as if I had somehow uncovered a precious little secret of their trade! 😆 Sorry guys, your secret is out 🙊! This stuff is under $15 a gallon and is absolutely worth its weight in gold. If you're attempting this or any other DIY painting project, I can't recommend it highly enough!
Sometimes, taping can be one of the most tedious parts of a paint project. Since these are casement windows which open out with a little crank handle (except for the 2 in each corner, which are fixed), I didn't even bother taping them off because it is so much easier just to scrape off any extra paint off of the glass with a razor blade. I picked up this handy little scraper from the hardware store and it worked like a charm (just be sure to keep it away from kids!). For the corner windows that don't open, I used my favorite kind of painter's tape around all of the edges.
All in all, it took about 2 coats of paint and 3 days of slowly chipping away at it whenever I could carve away some time. Not bad for 12 windows! Since I knew I would be scraping off any extra paint from the glass with a razor blade, I wasn't too worried about "coloring outside the lines". Especially on the first coat, I tried to just make sure I covered every surface and got in all the little nooks and crannies of the wood grilles. Since I used latex paint, there wasn't much time required for drying between coats. After the second coat dried, I went around and removed all the painters tape and scraped off all the excess paint with the razor blade. Sometimes a little too much paint came off, exposing some of the white underneath, so I went back around at the very end and touched up any little areas that needed it.
The last 1% of the project took the longest and was the most tedious, just trying to make sure I didn't miss any spots. Knowing myself, I will probably still be noticing things in like 3 months that I need to touch up, so I'm keeping that scraper and touch-up paint handy!
This project honestly was not as difficult as I thought it might be, and I am so happy with how it turned out!
Here are a few snapshots of the "after":


Island:
The idea of painting the island made me more nervous than the windows, but in reality this turned out to be the much easier job! I used my sprayer for the doors and a small foam roller for the rest, and it took maybe 4 hours total. When I finished, it was one of those things that left me asking myself "why didn't I do this sooner!?" It's only a subtle difference in color, but to me that makes a big difference!


I would have used the sprayer for the whole thing, but I REALLY didn't want to cover my whole house in plastic and tape everything off first (lazy! 🙋). So instead, I just taped around the edges on the floor and countertop, removed all the cabinet doors and drawer fronts (as well as all of the hardware) and sprayed them in my back yard on a plastic tarp. If you're going to use a paint sprayer, just make sure you are doing it outside or in a well-ventilated and prepped area (little specks of paint will travel through the air and land on any surface that's not covered). Also, if you're spraying outside, you need to make sure it's not too cold, hot or humid outside because that can adversely affect the paint job. Otherwise, this sprayer is so easy and intuitive to use! This is only the 2nd time I've ever used it so don't feel like you need to be a seasoned paint-spraying expert to do it! If it makes you feel more comfortable, you could practice on a test piece first just to get a feel for it.
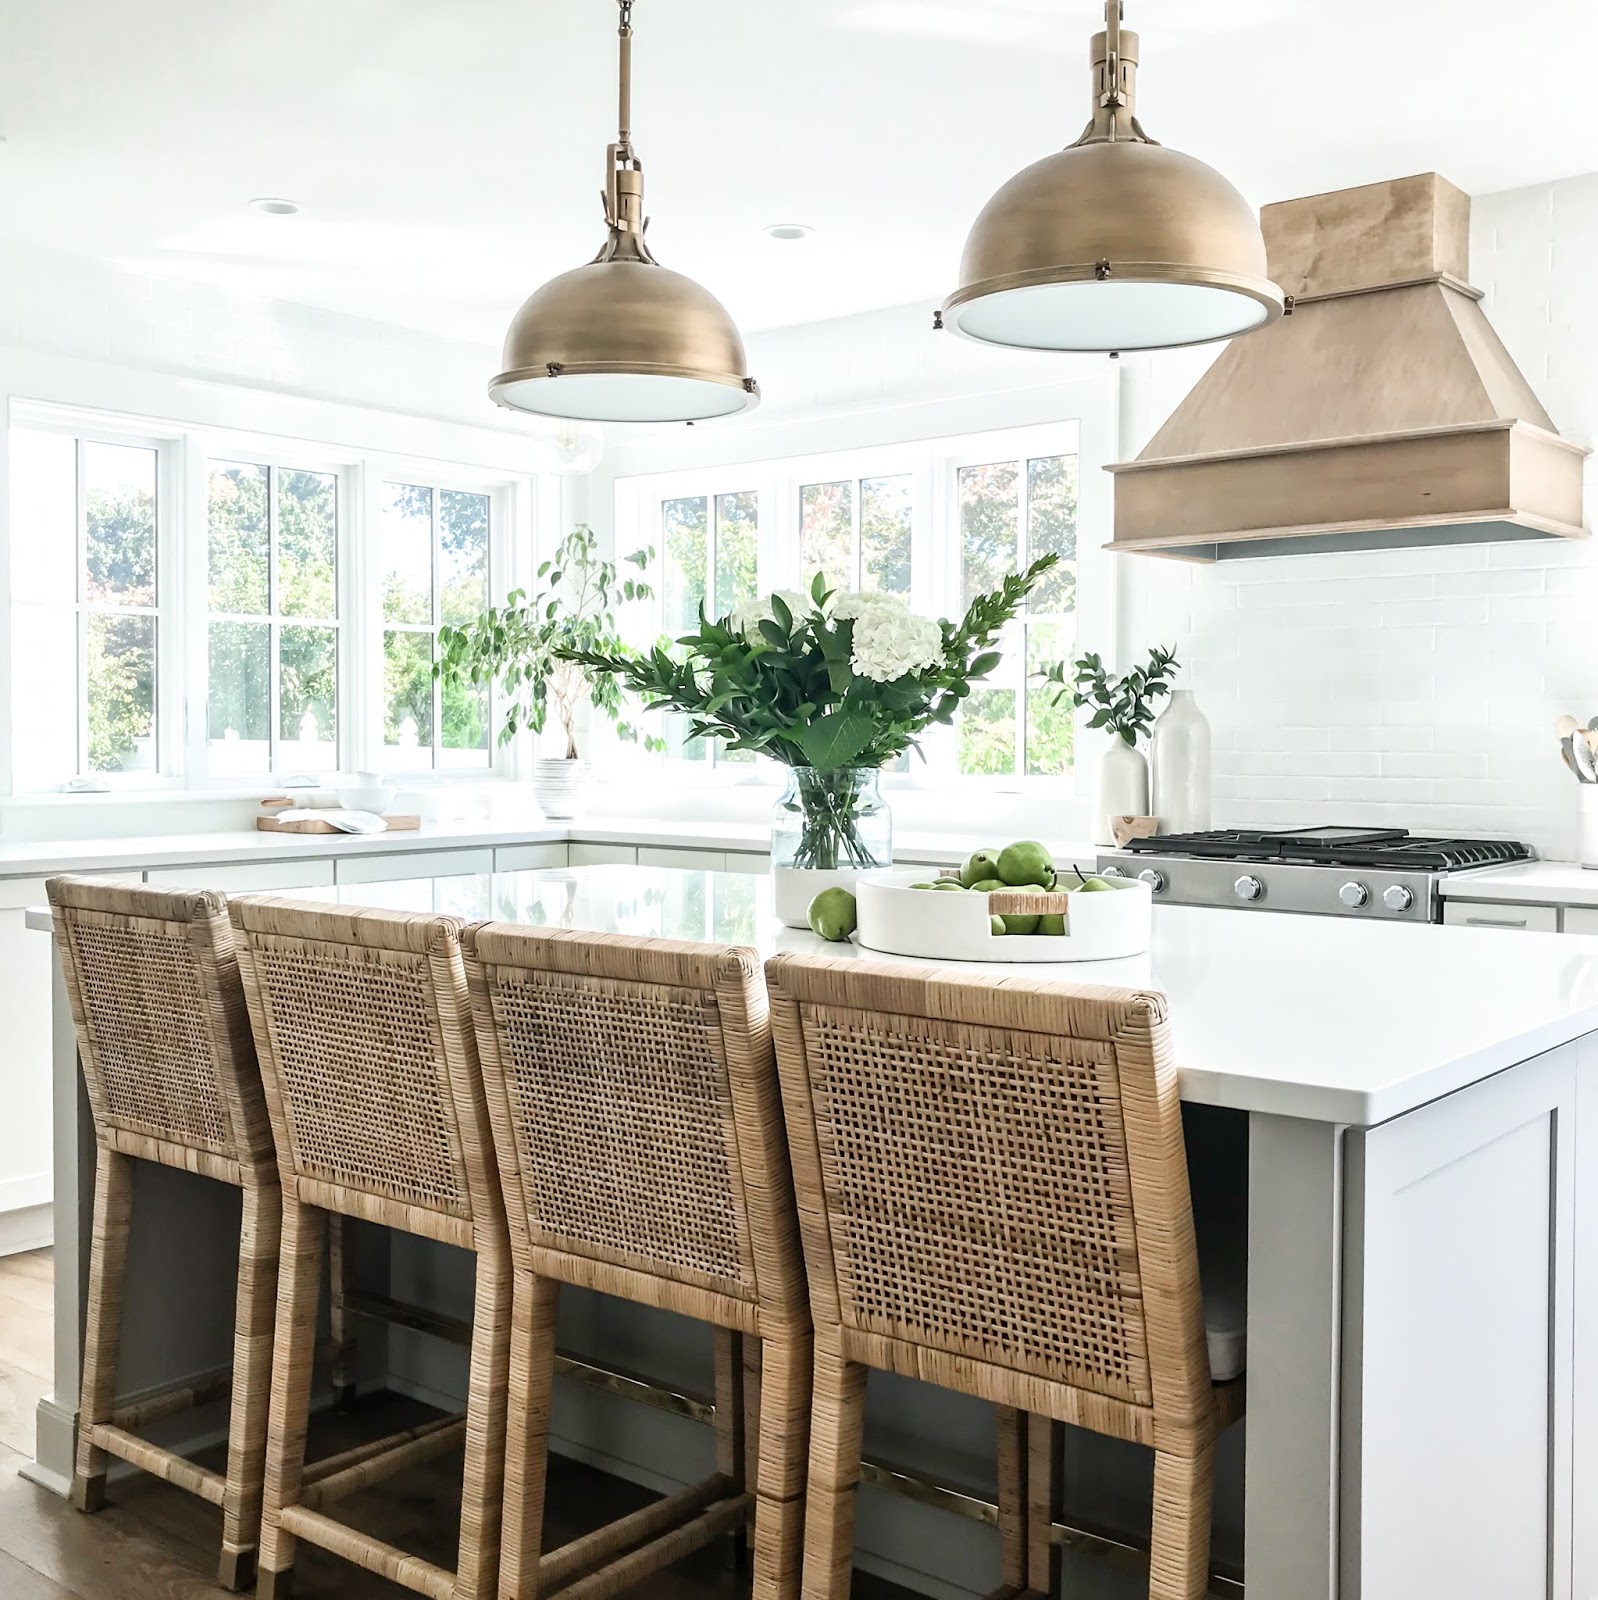
After reading lots of reviews, the paint I chose for the island was Benjamin Moore Advance (the color is Gray Owl in a satin finish). Here's how the new color compares to the old pre-finished color:

The new color is a few shades lighter, which I liked to offset the black windows, and no more purple undertones! I also love how it contrasts with the statuario quartz countertops. I'm seriously considering doing it on all of the perimeter cabinets next 😬
This paint goes on like a smooth enamel and had amazing coverage with only one coat of paint. I added some liquid magic (i.e. Floetrol) into the paint to help it flow and lay evenly, and it went on so beautifully. I started with the backs of all the cabinet doors & drawers, and while they were drying I went inside to use the foam roller to put a coat on the rest of the island. Then while that was drying, I went back outside to do the other side of the cabinet doors & drawers with the sprayer.
There were a few small areas where you could see subtle roller marks on the island, so I used an extra-fine sanding sponge to gently sand those areas down before adding another coat of paint. Once everything was dry, I re-installed the doors, drawers and hardware and removed all the painter's tape. The finish looks so professional and I would do this again in a heart beat!
And, since I have all this leftover paint, you can bet that I'm over here dreaming up what to paint next 😉
I hope I covered everything you all had questions about, but please don't hesitate to ask if I forgot anything!
xo
Marcie
P.S. - Here are all the tools I used in this project -- I highly recommend all of them!
(These are commissionable links, which means I earn a small commission from the retailer at no extra cost to you if you buy through my links. It's just the retailer's way of acknowledging that you found these products through me and rewarding me with a small percentage of the sale).

 |
| CliqStudios "Urban Stone" |
The new color is a few shades lighter, which I liked to offset the black windows, and no more purple undertones! I also love how it contrasts with the statuario quartz countertops. I'm seriously considering doing it on all of the perimeter cabinets next 😬
This paint goes on like a smooth enamel and had amazing coverage with only one coat of paint. I added some liquid magic (i.e. Floetrol) into the paint to help it flow and lay evenly, and it went on so beautifully. I started with the backs of all the cabinet doors & drawers, and while they were drying I went inside to use the foam roller to put a coat on the rest of the island. Then while that was drying, I went back outside to do the other side of the cabinet doors & drawers with the sprayer.
There were a few small areas where you could see subtle roller marks on the island, so I used an extra-fine sanding sponge to gently sand those areas down before adding another coat of paint. Once everything was dry, I re-installed the doors, drawers and hardware and removed all the painter's tape. The finish looks so professional and I would do this again in a heart beat!
And, since I have all this leftover paint, you can bet that I'm over here dreaming up what to paint next 😉
I hope I covered everything you all had questions about, but please don't hesitate to ask if I forgot anything!
xo
Marcie
P.S. - Here are all the tools I used in this project -- I highly recommend all of them!
(These are commissionable links, which means I earn a small commission from the retailer at no extra cost to you if you buy through my links. It's just the retailer's way of acknowledging that you found these products through me and rewarding me with a small percentage of the sale).